 Image 1 of 3
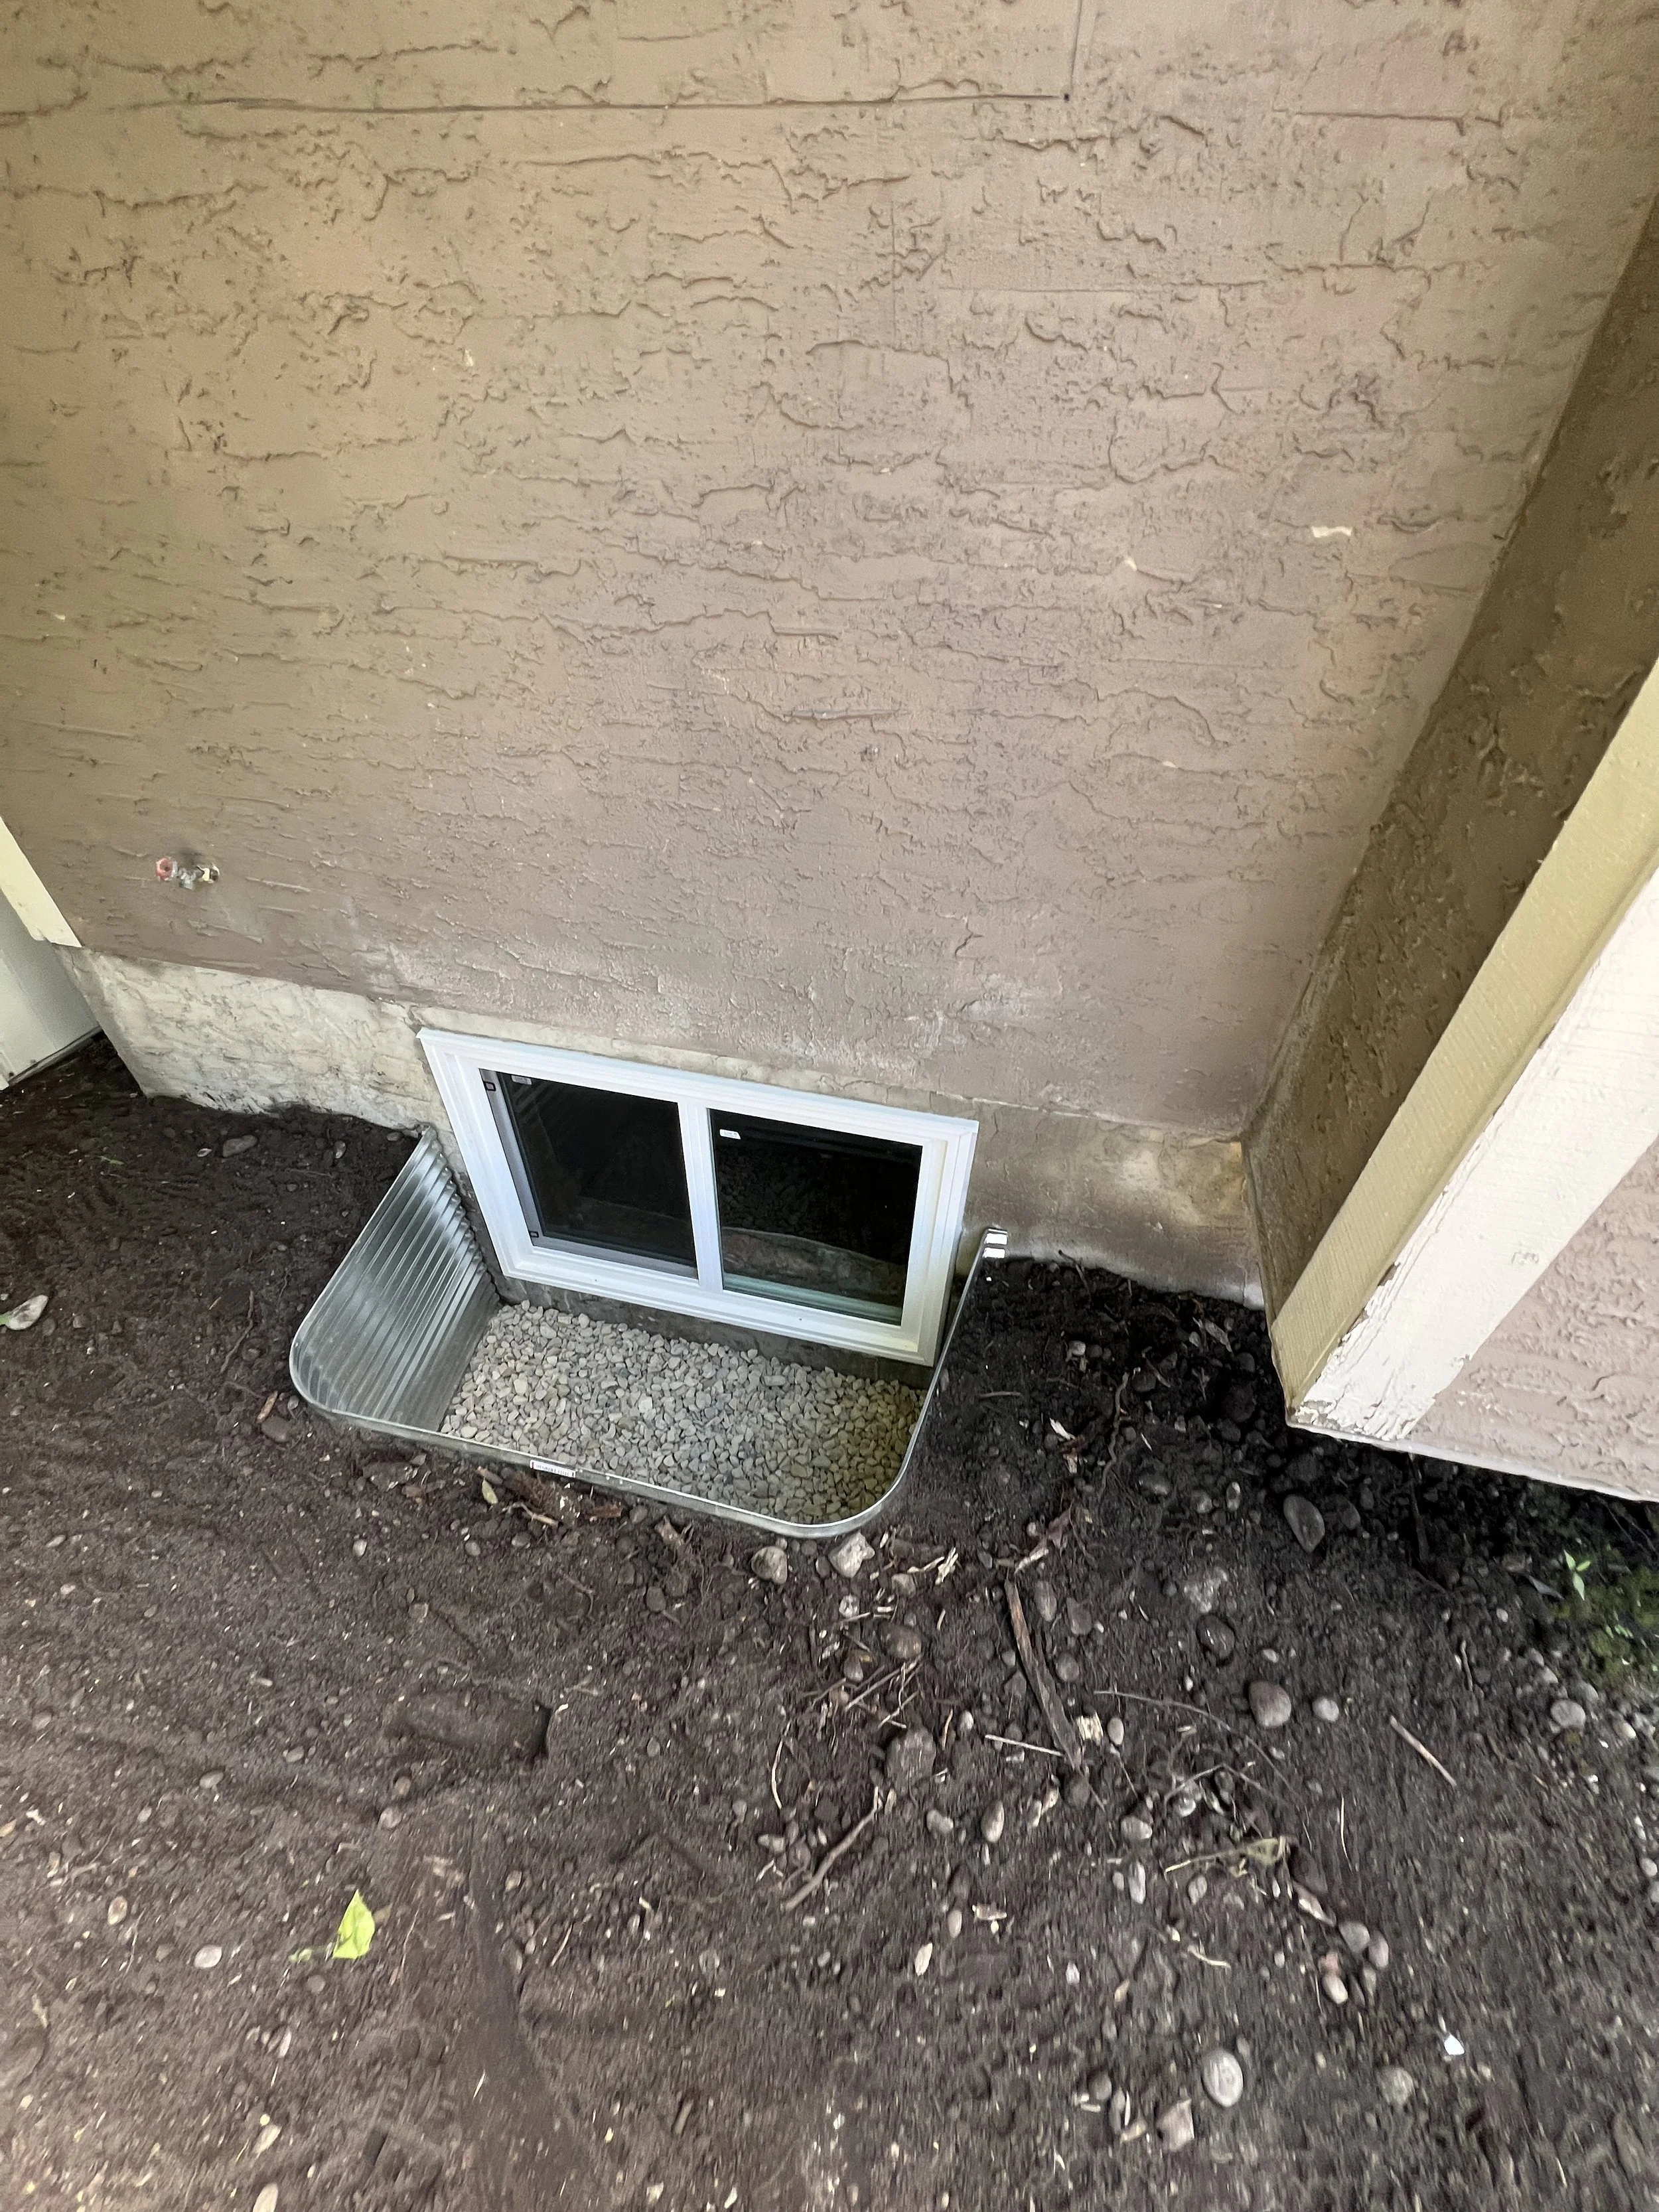 Image 2 of 3
 Image 3 of 3
Alright, brave adventurers, we’re nearing the epic finale of our window-well quest! Buckle up—this is gonna be a wild ride, like a 10-hour D&D campaign from my geeky youth (don’t tempt me to roll a d20 for nostalgia)! Let’s refocus and dive into the mystical world of Window Wells! 🧙♂️
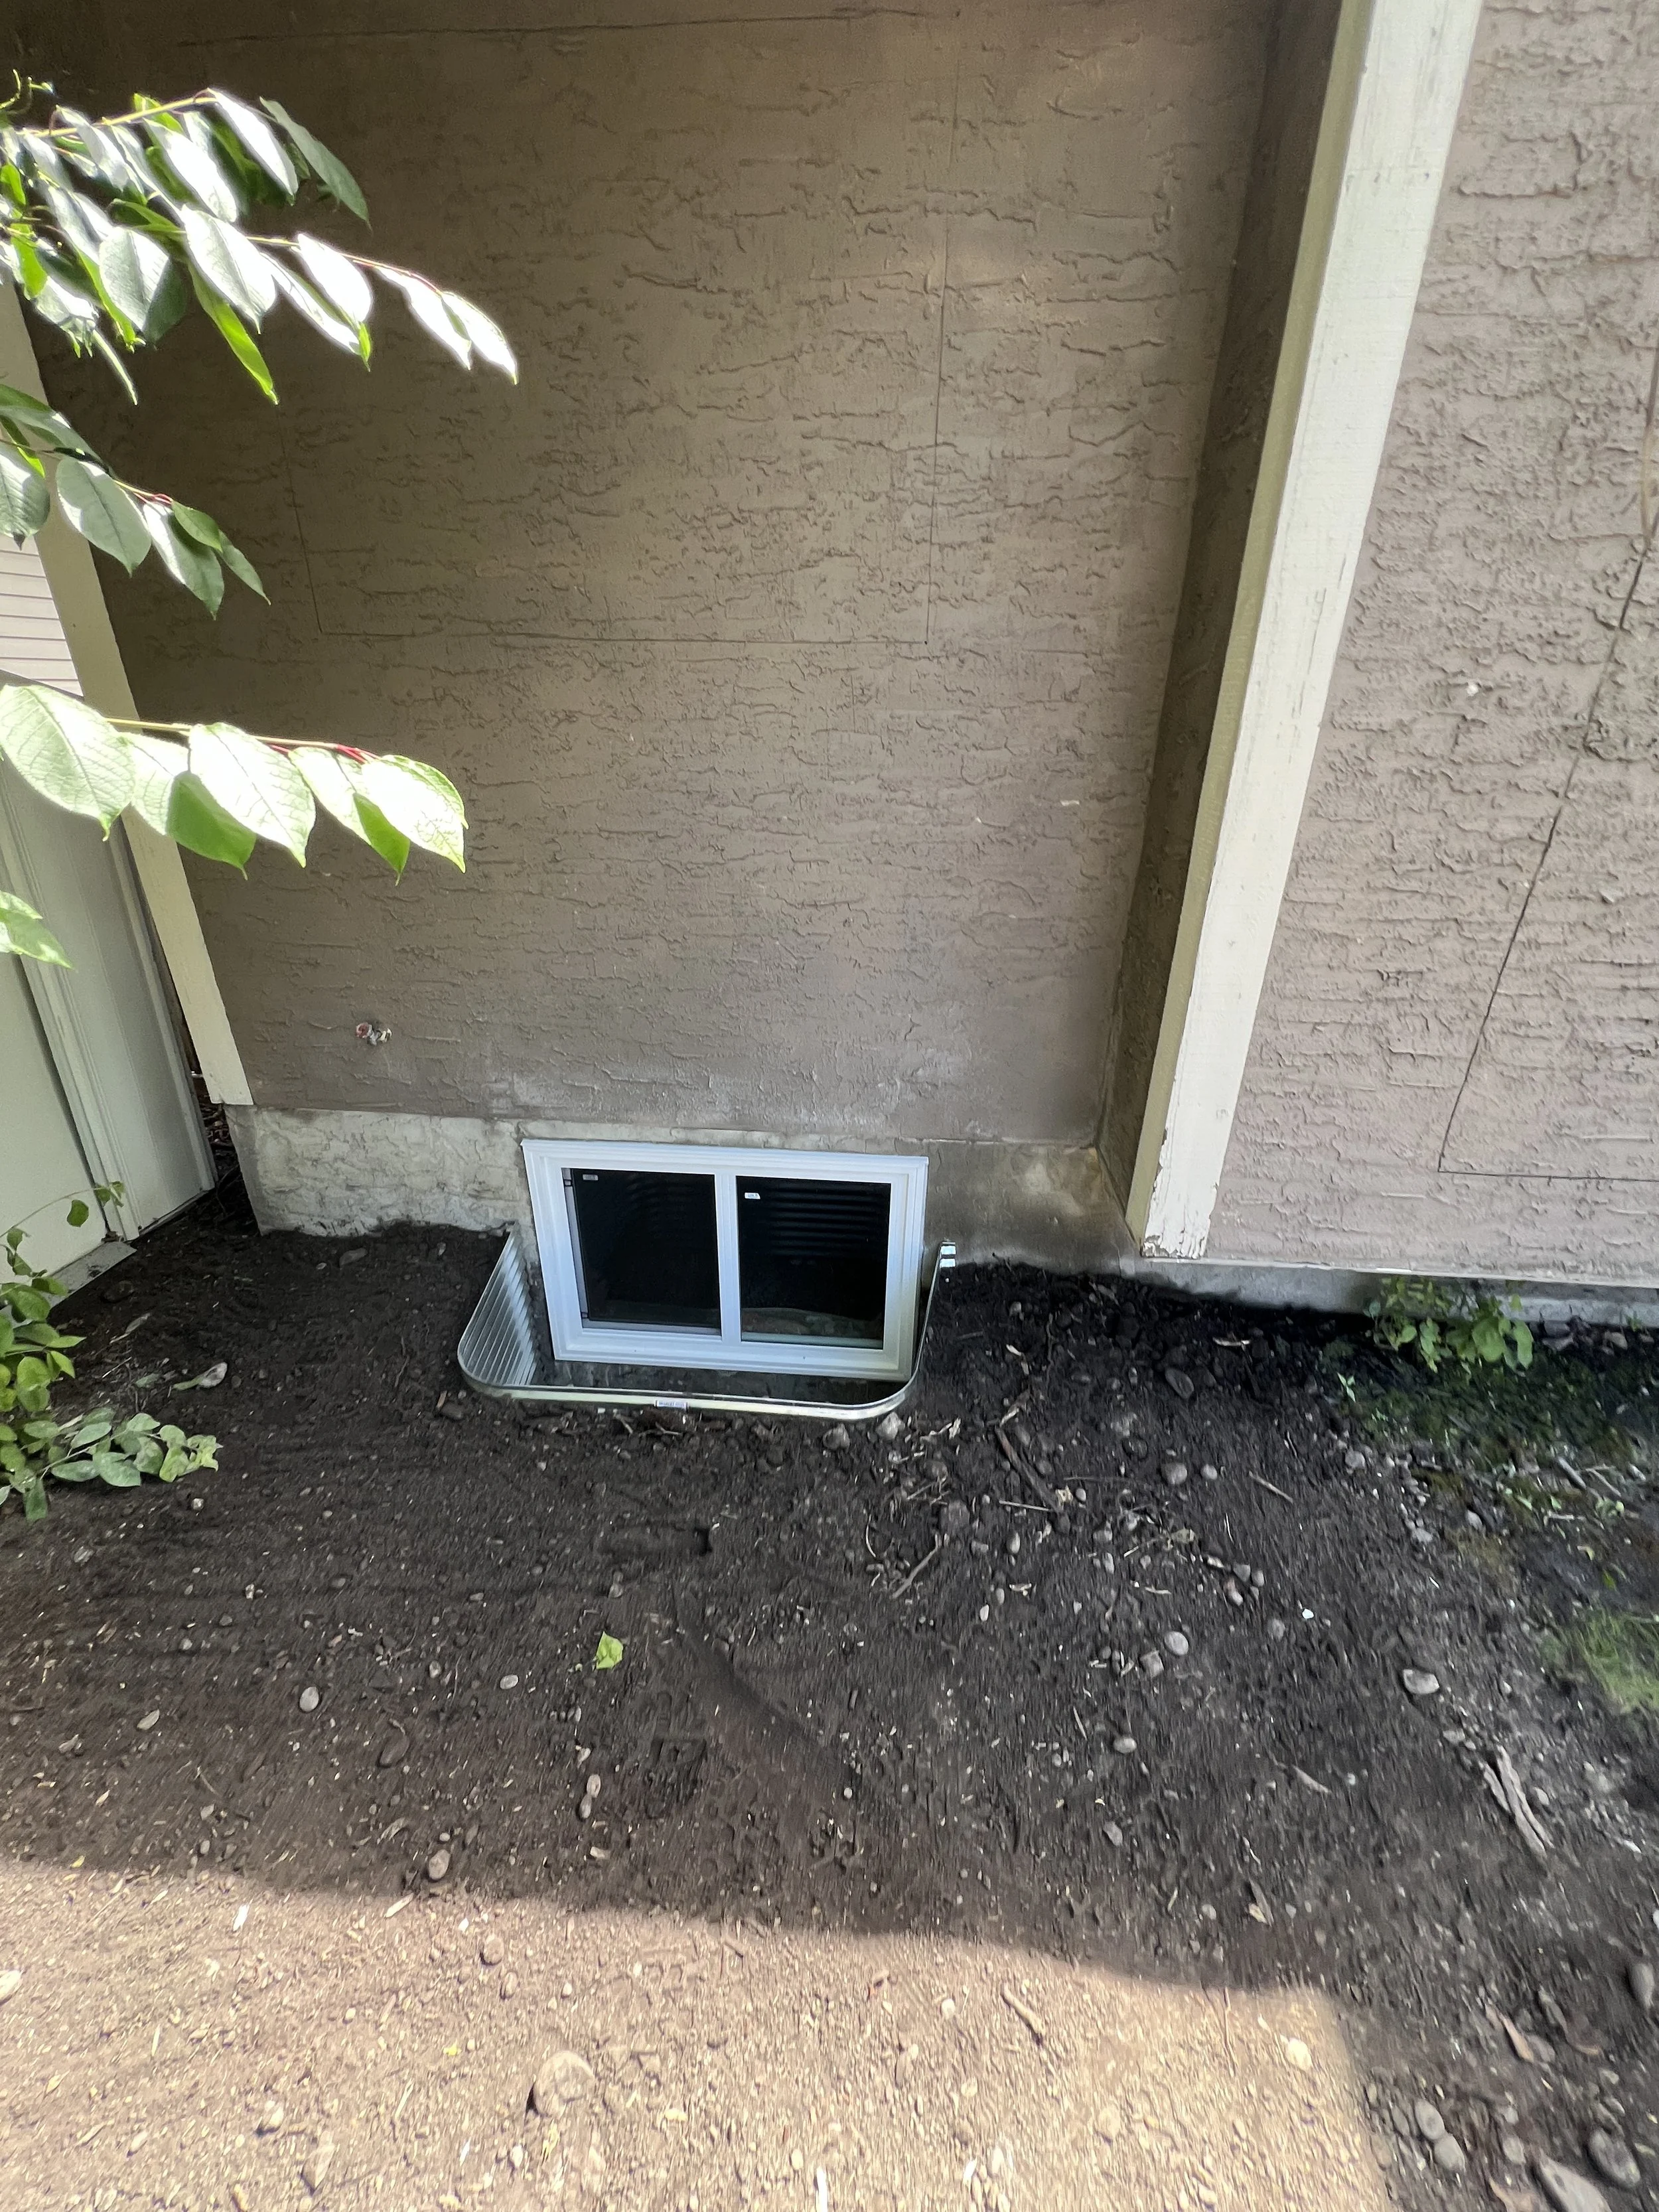
So, what’s the deal with these window wells? They’re the unsung heroes that hold back the dirt from your freshly dug excavation, creating a cozy escape hatch through your new egress window (we’re talking a roomy 3.78 sq/ft opening, with no side skimping below 15”). This gives you enough space to scamper out in a pinch—though let’s hope it’s just for epic backyard adventures, not actual emergencies! The Geeks wield three magical methods for window well installations:
1. The Crowd-Pleaser: The Galvanized Egress Window Well! This shiny, budget-friendly champ boasts a standard 30” projection (or beefier custom sizes) from the concrete foundation’s face. It’s like the reliable bard of window wells—versatile and always a hit!
2. The Timber Titan: A Pressure-Treated Window Well! Picture a mountain of 4”x6” pressure-treated lumber, crafted by our energetic Geek artificers armed with a woodworking arsenal. A few hours of their carpentry sorcery, and bam—you’ve got a sturdy, custom-built masterpiece!
3. The Grand Enchanter: The Tiered Pressure-Treated Window Well! This is the Timber Titan’s glow-up, with extra excavation for tiered projections, more lumber for a towering structure, and a sprinkle of extra time for the Geeks to weave their most intricate spellwork. It’s the wizard’s tower of window wells!
Let’s zoom in on the Galvanized Window Well quest line—because the other two are epic sagas that might lull you into a cozy nap! 😴 Here’s the quick-and-quirky guide:
1. Summon the Steel: Grab that sleek, bent galvanized steel well and plop it into the excavation, perfectly centered to your shiny new window. No one wants a lopsided window well stealing the show, right?
2. Dirt Dance: Scoop up that excess dirt we left lounging around from the excavation and pile it behind the well’s back face for some solid pressure. Grab a trusty level (the longer, the better!) and span it across the well, aiming for a horizontal and vertical vibe—snug against the foundation like a cozy hug.
3. Fastening Frenzy: Time to lock it down! Everyone’s got their own flair for this—some are Team Screw, others Team Bolt. No judgment here; just pick your potion and secure that well’s lip to the foundation on both sides. It’s the only rule that matters in this Geeky fastening ritual!
4. Earth Embrace: Bring all that leftover dirt to surround the well, filling the gap between the excavation edge and the well itself. Compact it like you’re stomping out a victory dance! Bonus points: sculpt a gentle slope away from the well’s edge to the surrounding grade, so water skedaddles away from your window well kingdom.
5. Rock the Well: Pour in your chosen treasure—rock, gravel, or stone—to a depth of at least 4”, leaving 6-8” of breathing room between the gravel’s surface and the window’s bottom. It’s like giving your well a comfy, stylish blanket!
BOOM! POW! You’ve conquered the window well quest, you legendary Geek adventurer! Take a bow—your egress masterpiece is ready to shine! 🎉
Alright, brave adventurers, we’re nearing the epic finale of our window-well quest! Buckle up—this is gonna be a wild ride, like a 10-hour D&D campaign from my geeky youth (don’t tempt me to roll a d20 for nostalgia)! Let’s refocus and dive into the mystical world of Window Wells! 🧙♂️
So, what’s the deal with these window wells? They’re the unsung heroes that hold back the dirt from your freshly dug excavation, creating a cozy escape hatch through your new egress window (we’re talking a roomy 3.78 sq/ft opening, with no side skimping below 15”). This gives you enough space to scamper out in a pinch—though let’s hope it’s just for epic backyard adventures, not actual emergencies! The Geeks wield three magical methods for window well installations:
1. The Crowd-Pleaser: The Galvanized Egress Window Well! This shiny, budget-friendly champ boasts a standard 30” projection (or beefier custom sizes) from the concrete foundation’s face. It’s like the reliable bard of window wells—versatile and always a hit!
2. The Timber Titan: A Pressure-Treated Window Well! Picture a mountain of 4”x6” pressure-treated lumber, crafted by our energetic Geek artificers armed with a woodworking arsenal. A few hours of their carpentry sorcery, and bam—you’ve got a sturdy, custom-built masterpiece!
3. The Grand Enchanter: The Tiered Pressure-Treated Window Well! This is the Timber Titan’s glow-up, with extra excavation for tiered projections, more lumber for a towering structure, and a sprinkle of extra time for the Geeks to weave their most intricate spellwork. It’s the wizard’s tower of window wells!
Let’s zoom in on the Galvanized Window Well quest line—because the other two are epic sagas that might lull you into a cozy nap! 😴 Here’s the quick-and-quirky guide:
1. Summon the Steel: Grab that sleek, bent galvanized steel well and plop it into the excavation, perfectly centered to your shiny new window. No one wants a lopsided window well stealing the show, right?
2. Dirt Dance: Scoop up that excess dirt we left lounging around from the excavation and pile it behind the well’s back face for some solid pressure. Grab a trusty level (the longer, the better!) and span it across the well, aiming for a horizontal and vertical vibe—snug against the foundation like a cozy hug.
3. Fastening Frenzy: Time to lock it down! Everyone’s got their own flair for this—some are Team Screw, others Team Bolt. No judgment here; just pick your potion and secure that well’s lip to the foundation on both sides. It’s the only rule that matters in this Geeky fastening ritual!
4. Earth Embrace: Bring all that leftover dirt to surround the well, filling the gap between the excavation edge and the well itself. Compact it like you’re stomping out a victory dance! Bonus points: sculpt a gentle slope away from the well’s edge to the surrounding grade, so water skedaddles away from your window well kingdom.
5. Rock the Well: Pour in your chosen treasure—rock, gravel, or stone—to a depth of at least 4”, leaving 6-8” of breathing room between the gravel’s surface and the window’s bottom. It’s like giving your well a comfy, stylish blanket!
BOOM! POW! You’ve conquered the window well quest, you legendary Geek adventurer! Take a bow—your egress masterpiece is ready to shine! 🎉